Luc began this job in the spring of 2005 and finished it early that summer. It consisted of 2 rock walls one above the other, separated by a steep slope. The Lower Wall is situated at the base of a steep slope and served to increase the parking space and aesthetic appeal of the driveway. Before the wall, the homeowners had some trouble turning in their cramped driveway. The property is located on the east side of the island and their home is on a bluff that drops off into the water. The Upper Rock Wall is located at the top of the property and was made by dumping and compacting a large amount of soil to make the slope at the top level enough to increase the usability of the land. All in all the job consisted of:
-building of 2 large rock retaining walls with an excavator
-one rock stairway (upper rock wall)
-delivery of rocks and soil to property
-moving of soil from delivery zone through a 5 foot wide path to the Upper Rock Wall with a loader

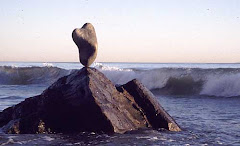
(Above) A picture of the finished lower rock wall, with Luc in front of it. Luc worked very hard to make sure that the Kinnickinnic bush (with red berries above his head) was left undamaged. It is such a beautiful plant and at the time there were bees all over it!

Above: the Upper Rock wall. This wall serves as a retaining wall for a (now) flat grassy area. This location was originally a sloped grassy area that turns into a vertical drop (right after where the photographer is standing). At the bottom of the vertical drop is the Lower Rock Wall (pictured first on this post), then the homeowner's parking and after that their home. While Luc was working on this wall, he had to be especially careful with how he placed the rocks as to not let one go rolling down hill into their home! All went well and the Upper Rock Wall now raises the slope so that there is a flat, grassy outdoor space that the homeowners can use for entertaining and for enjoying the beautiful sea view.

ABOVE: working on the Lower Rock Wall. Placing the base level rocks and sifting through the rock pile to piece the puzzle together (BELOW).

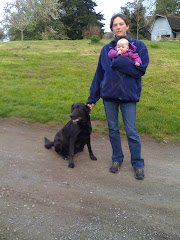
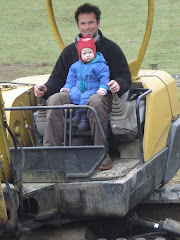
BELOW: Luc with baby daughter Marina in the loader that he used to move dirt to make the Upper Rock Wall and flat grassy area.

BELOW: A lot of dirt to move!


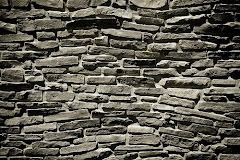
 "After" picture of the rock wall (above), only a partial picture of the wall. There is also a staircase in the middle of the wall to the left of this picture.
 BEFORE the rock wall & stairs (above)
 (ABOVE) finished wall, stairs, and garden beds.


+138.jpg)